Welcome to Flightinfo.com

  • Register now and join the discussion
  • Friendliest aviation Ccmmunity on the web
  • Modern site for PC's, Phones, Tablets - no 3rd party apps required
  • Ask questions, help others, promote aviation
  • Share the passion for aviation
  • Invite everyone to Flightinfo.com and let's have fun

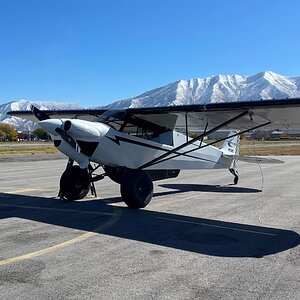
Upgraded landing lights for CubCrafters Carbon Cub FX-3

Welcome to Flightinfo.com

  • Register now and join the discussion
  • Modern secure site, no 3rd party apps required
  • Invite your friends
  • Share the passion of aviation
  • Friendliest aviation community on the web
I found the data on the AeroLED used in the CubCrafters forum post back in 2020 I believe it was.


That light draws 3A more per light, or 6A total continuous. For those that installed those you may want to consider switching to the Parmetheus G3's which are 3.8A per light or a net savings of 6A. While your wiring may be sufficient, the draw on the small alternator is the other part of the equation. I personally want to minimize this load on the alternator which is already probably pushing it with IFR panel installs and all of the associated avionics.
 
FYI - this project is a NO GO due to the wig wag controller that is a custom build by CubCrafters seems to have a 2 amp limitation per light from what I can find. I'm waiting to hear back from CubCrafters to see if they have a higher capacity controller that they may be using for their lighting upgrade option.
 
Impressed with FLYWAT.COM customer service. I emailed them yesterday of my dilemma and they replied today (Sunday) with an answer. As it seems CubCrafters is also using the G3 lights (not sure which aircraft) that they did design a new flasher, apparently WAT sources it. They asked me to reach out to CubCrafters to source the newer version that accommodates up to 5A.

Part #: 01-0771700-01

 
I see that this part is a generic WHELEN automotive headlight flasher so I found it online and ordered one for $72.

 
Last edited:
Status update:

This has not been as simple as I had hoped. Figuring out the wiring between the old wig-wag (real term is "flasher") and the new one has been a challenge. I'm super appreciative the time Pete at CubCrafters and avionics have spent with me as we figure this out together as this flasher is also new to them and we have some wiring hurdles still to be figured out. They are using this, or going to use it, in aircraft going forward, or aircraft with the newer lights and there are some things that need revision yet it seems. I'm going to test the latest plan discussed with Pete last night when I return to the plane this afternoon.

I certainly want the better lights but I sure opened a can of worms and really wish I would have left the darned thing as is. But I'm going to get through this and in the future CubCrafters is planning to offer a retrofit kit for others that want to (or need to) upgrade lights when you can no longer source the old lights if needed. It is going to be a level 7 effort to do regardless, not super hard, but you better be comfortable with what will be required to do.
 
I'm happy to report this project is complete. I'm upgrading it to a level 8 effort, it's not as plug and play as I had hoped. So let me summarize as brief as I can:

First: I looked up the part WAT told me about and ordered it online later realizing I had the wrong flasher. It's essentially the same but it was not the solid state one so you heard relay clicking every time lights were turned on/off which was annoying and hopefully something I wouldn't hear in flight, however, I realized I had the wrong one and overnighted, Saturday delivery the correct one which arrived yesterday.

Yesterday morning I needed to stop and figure out the 3 position switch CubCrafters uses in the FX-3 and stop just guessing with wires on various terminals etc. Days of that proved futile. So I used my voltmeter (thank you YouTube university) to do continuity checks and figure out in each switch position which terminals were open. Someone at CubCrafters was smart and used the jumper cable going top right to middle left (from back) to solve a problem and now it was time to forget everything suggested and wire it up per what I saw on YouTube on this SSFPOS flasher and in the Wheelen instructions. I informed WAT that their guidance on wiring was incorrect, they finally realized that and engineering is working on revising their documentation. I shared the solution with them yesterday from what I discovered.

The wiring is simple, yeah, once you figure it out. So here is what I ended up with:

Blue goes to one side of the landing light molex via inline fuse with 5A fuse. Yellow goes to the other side of the 2 pin molex (the molex is your left/right leading edge lights)

Black is ground

The incoming power supply (white line) from the left wing root "landing" breaker goes directly to the red line into the flasher which will power the lights. It does NOT go into the 3 position switch as before.

The orange wire needs a low voltage (1A) or better power source which tells the flasher to flash so that goes to the bottom left terminal. I brought in a separate power supply from my taxi light breaker, positive side, to the middle right position of the switch (from rear). I also tried a y-splitter from the incoming power line to both the flasher red and the middle right back of switch and that worked as well. I just didn't want to send 10A down the orange wire which is smaller gauge and the Wheelen documentation indicates 1A. There is a probably a better power source for this, something closer to 1A or 2A but I went with what was easiest for me to connect to from the GDU panel opening.

The white wire is used to tell the flasher to power the lights but not flash. That goes to the bottom right of the switch.

The white with violet stripe wire is used for programming the flasher pattern. While the flasher is flashing touch this wire to any 12V power source and it will change the pattern among the half dozen or so patterns. I capped that off to ensure it doesn't contact anything but is available should I decide to change my flasher pattern to something different later, or if it needs to be reset for some reason.

What a relief, it worked, right up until the EXT breaker popped when in ON mode (both lights on, max amps pulled, around 8A for two lights). The EXT breaker is 7-1/2A. I have no idea what the EXT breaker is for so I shined my batman light up and got a call from @Tsquared and put him to work to figure that out as he's deciphered the breakers in the past. Would be nice if CubCrafters had a cheat sheet in the AMM on what all breakers do for us non kit builders. How the hell are we to know what EXT does? I had a hunch it was for "external lights" so I had another 10A push pull breaker luckily since FedEx "lost" (severely delayed) my original shipment from CubCrafters that I ordered a second shipment and of course the day after I did that the original shipment arrived, giving me two 10A breakers.

I decided to replace the 7-1/2 A breaker with 10A and that was not that easy hence bumping this to level 8 effort. I removed all of the nuts securing the breakers on that row and that helped push the bus bar etc. aft so I could remove and replace the breaker.

Another test and that worked! Pete answered my text, on Saturday (thank you Pete) and informed me the EXT breaker is the line that powers the left wing root breakers. I suggested to him that the EXT breaker needs to match the largest breaker on the left wing root, i.e. I changed "landing" to 10A therefore EXT needs to meet or exceed. He advised caution to verify the wire gauge from EXT to left wing root is sufficient, best I could tell from wire diagrams is that it is is 20 awg and that should be sufficient in my non electrical engineer opinion, but I need to review what's being powered, etc. It would not be hard to run a new line if needed but I don't think it's needed.

I did another ground test of 15 minutes on steady (ON) with the landing lights and no issue. I typically fly in wig-wag, even at night, and that would be 4A (rounded up) vs. 8A so 99% of the time the EXT breaker issue and load on the left wing root is not an issue. At night on final is when I switch to landing light ON. Now if I'm staying in the pattern, at night, I doubt I'd be changing out of ON and back to ON each time, etc. So yeah, you need to test worst case which is landing lights ON and wire for that. I think I'm good, will review and assess and if needed run a heavier gauge wire.

I did a short test flight in the pattern and I'm getting noise over COM1 when the lights come on when in wig-wag, static with ON. I did not shorten any of the wires so I need to now finalize my wiring by shortening to the minimal needed and also pay careful attention to the routing of the two landing light inline fuse wires as they are the ones I think causing the issue. I'm 99% there but this final issue is yet to be resolved.

In the end the parts required are:
  • 2 x Parmetheus G3 landing lights
  • 2 x 10A push pull breakers (got from CubCrafters, not sure how to source them otherwise)
  • 1 x SSFPOS Wheelen solid state flasher. I ordered two online from two different vendors, I'll have a backup at least or can sell it to someone in need of one. Here is the other vendor I bought from which I suggest using, better online ordering system. Roberts & Son
  • A good crimp tool, my crimps sucked so I went to Lowes to buy the best crimper I could find and they only had one but the Klein was so much better. Also got the nice Klein wire stripper
It was painful, it's not over, and hopefully will pay off and not be a problem going forward. Would I do it again? NO! Leave well enough alone. I was approaching end of RMA with Aircraft Spruce and wasn't going to let $600 in lights not be used so I persevered. However, the day may come you can't source the 10+ year old lower power LED lights and you have to upgrade your lights, wiring, flasher, etc. CubCrafters home brew flasher is a 2A limit I believe. CubCrafters is working on a retrofit kit and hopefully will be more plug and play when available and they will also have a better look at the wiring and if it's sufficient or not.


IMG_5995.jpeg
 
Last edited:
Getting closer but still having a problem with RF noise in the radios or intercom, think radios. Not as bad as last time. Today I cut all wires down to lengths that will not be in excess. Removed the inline fuses as I don't think they are needed, that's what the breaker is for. At least for now to resolve this issue. I moved the flasher further left and is sitting on top of my aithre which is on top of the GEA24. I'll go back this week and try to figure out what the wires are close to or should not be close to. I may have to reach out to Pete for this one at CubCrafters but need to research the prior wig-wag setup and wiring locations if I can find a picture and look at some documentation as well. I'll keep trying but I'm getting to the point I may go back to the old lights and flasher until CubCrafters goes down this path. I'm not sure if there is some line filter that may be needed for this new flasher to prevent this RF interference.
 
Update 906 - talked to WAT and they tell me they have customized the flasher for aviation use and the one I bought is for automotive use so I'm going to try and source one of those. I don't believe it will solve the RF interference issue but we will see. I'm also going to keep working on trying to get my wires away from whatever is interfering with my radio(s). It's mainly the GNC 355 but COM2 also has it at times.

I'm getting there...I've put away the shovel from the hole digging...standby for updates.
 
Update and probably final on this saga. The new WAT flasher is installed, it's a customized version of the one I bought online, hard coded flash rate, wires setup for easy drop in install. My issue with static on the GNC 355 was a poor choice for grounding on the avionics tray. While it is grounded, it's not the right place. I was able somehow to get a screw into the plate where the grounds are in the back of the tray as there is another hole in that plate so I have a good ground and the static is gone in the GNC 355. Everything is wired in as good as I can get it yet I still have squelch break occurring on the GTR-20R and even adjusting squelch levels doesn't fix it. It has to be something with power going into the landing light wires and the location of the wires I assume. I sent an email to CubCrafters and will wait for a response as there is nothing else I can think of to do. I'm not sure if WAT used shielded wires out of the flasher if that would help but I think the problem is again the current going into the landing light molex feeding the lights. Maybe somewhere it's close to the COM2 antenna wire and the prior lights weren't enough power to be a problem and now it is. My option is either to deal with it, it's really not an issue unless landing lights are steady ON which is only at night on final, or put the old lights back in. CubCrafters tells me the old wig-wag controllers are no longer available so everyone will have to go to the newer WAT versions.
 

Latest resources

Back
Top