- Joined
- Oct 31, 1996
- Posts
- 1,701
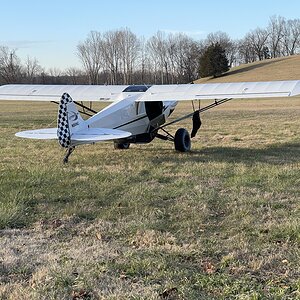
- Type aircraft owned
- Carbon Cub FX-3
- Base airport
- KFCI
- Ratings
- COMM, IFR, MEL, SEL
I originally installed mesh nets on the side panels using either double-sided clear adhesive or silicone adhesive. The problem is the frame is not flat in the back so there really isn't anything to adhere to. The silicone gets in the void better and can work well but it can also be a bit messy and in the end, nothing really adheres well and you can start getting separation.
Long ago I asked a question on this forum about how to attach something to a panel and @Cactus Charlie gave the great suggestion of using rivet nuts. Something I've never heard of or used. They are magic, really neat little things. You use a tool to install them which is ultimately a threaded end that screws into the rivet nut and pulls it like a rivet and then you unscrew the tools out of the rivet nut.
At last year's condition inspection I pulled the left center panel off to do some inspections and adjustments for a stiff throttle and used that opportunity to put two mesh nets on the left side. I typically use the left forward mesh net for my wallet, glasses, etc. I later installed one below the door and that became my favorite as it is easy to get the wallet when out of the plane, etc. But the clear adhesive tape I used wasn't holding well so it was time to do it right. I asked a question on this forum not too long ago about removing the right hand center panel, below the door and it looked straight-forward.
I have the right forward panel out for my EarthX ETX-104 ignition backup battery MOD that's wrapping up now so I figured if I'm going to do this now is the time to get it done. I really didn't want to as I'm MOD'd out especially after the trauma of the left panel reinstall last fall. I feel like I've used 9 MOD lives and I'm about to do something I may regret so I really am at the end of my desire to MOD and it's time to just enjoy flying the plane after two years of never ending stuff from coil packs, and other MOD's.
Removing the right center panel in the end wasn't hard, but it was, just because of the velcro, trying to flex it with the rear rudder pedals, etc. but I got it out. I figured I'm going to regret this as getting it back in is going to be a pain.
I did a bunch of measuring to identify the location of the fuselage tubing to ensure the rivet nuts would not be in conflict on the back side so that took some time and a lot of rechecking. Even after all of that I still came close which I didn't expect, but all worked out. It took quite a bit of time to rub the adhesive tape off of this side panel which I could have left but I knew I needed to do the job right")
Reinstalling the right panel seemed like it was going too easy. Holes were lining up which I didn't expect. It all fit back in easier than anticipated. A few snap rivets did make me earn my mod pay but in the end it wasn't too back, it's done.
Note that my mesh nets both on left and right sides are in the area of the rear rudder pedals. 99.5% of the time my rear seat isn't even installed in my plane. I have the rear stick cover and my dog is the intended passenger. The other 0.5% will be someone along for the joyride or my BFR CFI and that hasn't been an issue. But it's something to keep in mind to probably not put anything in the side mesh nets when a pilot is in the rear seat. I also have the Tac Aero leather pouches, one on the left forward upper panel area and one on the back of the front seat so there is still storage for phones, wallets, checklists, glasses, etc. I just like having storage options and these mesh nets work well.


MOD COMPLETE. Now to wrap up the EarthX testing as soon as weather improves and button up the right forward panel and be done with this! I used M4 screws by the way.
Long ago I asked a question on this forum about how to attach something to a panel and @Cactus Charlie gave the great suggestion of using rivet nuts. Something I've never heard of or used. They are magic, really neat little things. You use a tool to install them which is ultimately a threaded end that screws into the rivet nut and pulls it like a rivet and then you unscrew the tools out of the rivet nut.
At last year's condition inspection I pulled the left center panel off to do some inspections and adjustments for a stiff throttle and used that opportunity to put two mesh nets on the left side. I typically use the left forward mesh net for my wallet, glasses, etc. I later installed one below the door and that became my favorite as it is easy to get the wallet when out of the plane, etc. But the clear adhesive tape I used wasn't holding well so it was time to do it right. I asked a question on this forum not too long ago about removing the right hand center panel, below the door and it looked straight-forward.
I have the right forward panel out for my EarthX ETX-104 ignition backup battery MOD that's wrapping up now so I figured if I'm going to do this now is the time to get it done. I really didn't want to as I'm MOD'd out especially after the trauma of the left panel reinstall last fall. I feel like I've used 9 MOD lives and I'm about to do something I may regret so I really am at the end of my desire to MOD and it's time to just enjoy flying the plane after two years of never ending stuff from coil packs, and other MOD's.
Removing the right center panel in the end wasn't hard, but it was, just because of the velcro, trying to flex it with the rear rudder pedals, etc. but I got it out. I figured I'm going to regret this as getting it back in is going to be a pain.
I did a bunch of measuring to identify the location of the fuselage tubing to ensure the rivet nuts would not be in conflict on the back side so that took some time and a lot of rechecking. Even after all of that I still came close which I didn't expect, but all worked out. It took quite a bit of time to rub the adhesive tape off of this side panel which I could have left but I knew I needed to do the job right
Reinstalling the right panel seemed like it was going too easy. Holes were lining up which I didn't expect. It all fit back in easier than anticipated. A few snap rivets did make me earn my mod pay but in the end it wasn't too back, it's done.
Note that my mesh nets both on left and right sides are in the area of the rear rudder pedals. 99.5% of the time my rear seat isn't even installed in my plane. I have the rear stick cover and my dog is the intended passenger. The other 0.5% will be someone along for the joyride or my BFR CFI and that hasn't been an issue. But it's something to keep in mind to probably not put anything in the side mesh nets when a pilot is in the rear seat. I also have the Tac Aero leather pouches, one on the left forward upper panel area and one on the back of the front seat so there is still storage for phones, wallets, checklists, glasses, etc. I just like having storage options and these mesh nets work well.
MOD COMPLETE. Now to wrap up the EarthX testing as soon as weather improves and button up the right forward panel and be done with this! I used M4 screws by the way.