- Joined
- Oct 31, 1996
- Posts
- 1,701
- Type aircraft owned
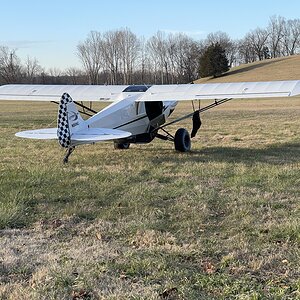
- Carbon Cub FX-3
- Base airport
- KFCI
- Ratings
- COMM, IFR, MEL, SEL
I saw some discussion regarding the Vernier mixture control and how simple it supposedly is to change out the "clickity" ratchet whatever is used in my Carbon Cub FX-3. I ordered one and it will be shelved until I'm decowled which hopefully won't be until later summer early fall for next condition inspection. I'm opening this MOD discussion for anyone to discuss how to change this out. With anything that could cause an engine failure I'm likely NOT do this myself so I will likely prep for the change and have the local maintenance shop and A&P/IA do this for me. But I'm open to learning what needs to be done.
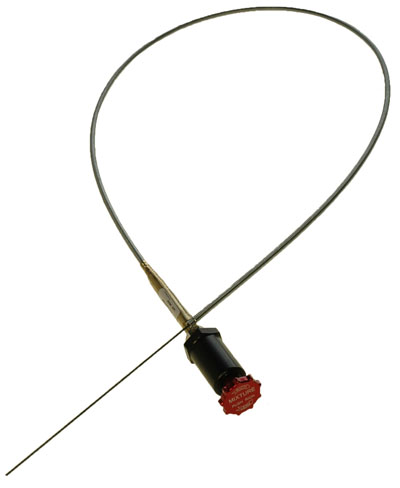
I ordered the 96 inch option per what I saw I think on the CubCrafters forum:
A-790 Vernier Control - Red | Aircraft Spruce ®
Interesting the cost is $163. Back in 2021 CubCrafters wanted $1100 for this over the standard mixture option.
Why do I want to change this? 1) Failures in the existing ratchet setup, 2) I hate when I'm right near lean of peak and need one more click out and I pull it gently as if I'm going to kill the engine if it pulls too far. I hate that feeling! Yeah, I know...but this is why. I just want a higher quality setup and one I don't need to be concerned with failing.
Discuss as desired. This MOD is on HOLD for me, part arrives today however.
Do any interior panels (left forward) need to be removed to do this? Or can everything be accessed from under the panel and forward of the firewall? I assume also a 3/4 inch hole will need to be created in the panel in the old location, not knowing what that size already is.
") - but I would not know.
- but I would not know.


 Notes for Setup